Showing posts with label tutorials. Show all posts

Tuesday, June 26, 2012

Photoshop Actions

I just found out about Photoshop actions. Okay, Okay this just shows that Adobe software has a lot of complex details that allow you to edit photos, layouts, and ect and it can take years to learn your new software (even though they update this every 18 months). Photoshop actions can take awhile to set up and finesse, but after you have your settings the way you like them. Actions can be the easiest way to edit a large batch of photos.

How to do it:
Windows > Actions > Create a new folder > Create a new action > Press record

Photoshop will then record all the steps you take to edit your photo. When you are done hit stop ▀ You should be able to open an image with similar attributes, play ► and get similar results.

The part that takes finesse is deleting layers that don't matter, and making sure your layers remember the colors and effects how you want them. If you are using colored layers make sure to use the shape tool.


Wednesday, October 19, 2011

Wonder of Pathfinder

In the past year I have discovered the wonder of the pathfinder tool. I can not pin point when I discovered how wonderful it was, but I am sure I found it by accident. It typically saves me at 3 steps compared to what I used to do before.Software is constantly changing (thanks Adobe for my empty wallet). Pathfinder tool enables to me to create unique vector illustrations. I included a quick illustration that uses my favorite tool:

Wednesday, June 29, 2011

Tutorial 1.Halftone


A couple weeks ago I promised to start putting tutorials on my blog. Here is my first project for you to try. 
A Halftone Vector Shape.
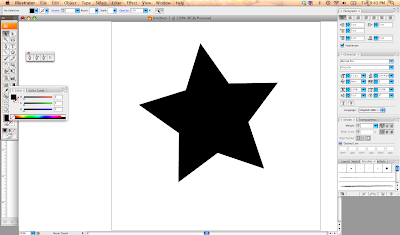
Step 1: Make a shape. Any Shape.

Step 2: Give that shape a gradient. I am using a radial gradient for this tutorial.

Step 3: Go to Effects in your tool bar and select Sketch: Halftone Pattern.

Step 4: Adjust your size and contrast to what you are happy with. I prefer my contrast high, so that the dots get better separation.


Step 5: Rasterize the shape. Then go to Object : Trace : Tracing Options


Step 6:  Adjust your tracing options, until you like the appearance (I always check the preview box so I can see my adjustments before I make a commitment. Trace & Expand the Appearance (so that it all become outlines)

Step 7: Select all the white areas, and delete. This way you are only left with the black.

Step 8: Now that we have the halftone pattern shape as a vector, we can make any size and color.


Please let me know how this tutorial went (it is my first and I am learning at doing this myself, so if anyone else has some helpful hints please leave a comment below). Also if you would like to see more tutorials or a tutorial for a particular project in mind just let me know! I tried to be clear in my directions, but if anything was confusing or needs definitions please let me know.

Thanks.

Sunday, June 12, 2011

Always a Student

Life often requires that we be constant learners, but as a graphic designer I seek out knowledge. "Knowledge is Power" I guess all those cheesy movies i was forced to watch as a child has fully brainwashed me. I crave learning, whether it is learning new techniques, new coding, or subjects completely separated from graphic design.

The internet is a quick easy source to develop further knowledge on almost any subject. I learn best by doing myself, so i can read as much as I want, I do not fully comprehend the words until I delve into it with my own hands.

With all of this being said, I plan on starting a section focused on tutorials or educational posts. If you have any subjects you wish to discuss or projects you wish to learn please leave me a comment. Not only can this be a helpful contribution to the design community, but more selfishly it will help me practice and learn useful skills. I am excited for this new endeavor.

In the meantime here are some good sites if you want to learn something new: